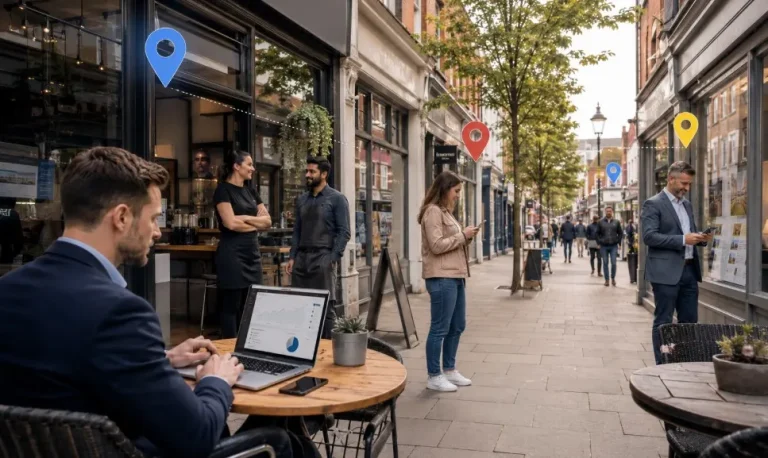
Shoppers rely entirely on your images when they cannot physically hold your items. Great photos build instant trust, answer unasked questions, and drive sales. Upgrading your visual strategy is one of the smartest and most profitable moves you can make for your business.
Think about the last time you bought something in a physical shop. You probably picked the item up, turned it around, felt the material, and read the label. When people shop on the internet, they cannot touch, hold, or try on your products. Your images carry all the weight that the in-store experience normally would.
When you set out to create a free ecommerce website, the quality of your imagery is more than just a nice bonus. It directly drives purchase confidence and revenue. If a buyer can’t clearly see what they’re buying, they’ll simply close the tab and buy from someone else.
With Wix for example, you can further optimize this journey using AI-driven product recommendations, automated discount logic, and customizable checkout workflows. In this guide, we’ll walk you through exactly how to use visuals to build trust, answer buyer questions, and confidently move your shoppers to the checkout line.
How to Create an Online Store That Converts Visitors Through Better Product Photography?
Why Your Product Images Are Doing the Selling for You?

Human brains are wired to process visual information incredibly fast. We understand an image in a fraction of a second, long before we read a single word of a text description. Because of this, a buyer’s confidence rises or falls within seconds of landing on your page. They look at the main photo and immediately decide if they trust you.
Your image quality directly translates to your perceived brand credibility. If you use dark, blurry, or unprofessional photos, shoppers will assume your items are low quality, too. On the flip side, crisp and well-lit photos tell the world that you run a professional, reliable business.
This matters immensely for new business owners who create an online store and need to shape a strong brand identity right out of the gate. You have to look the part to earn the sale. Good photos do the heavy lifting for you, acting as your best salesperson and convincing the buyer that they are making a smart choice.
What Makes Product Photography Actually Convert in Online Stores?
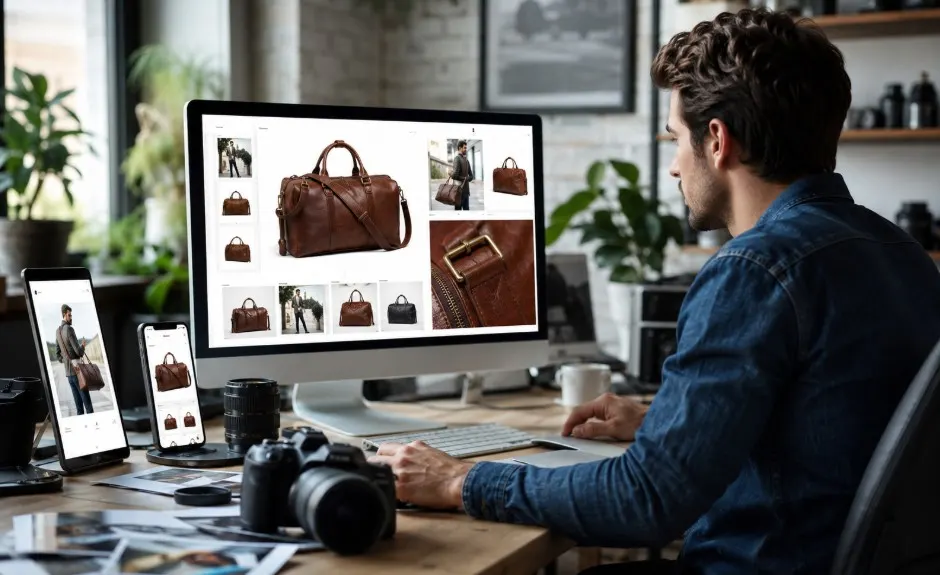
A picture that simply shows the item is not enough. High-performing images share a few specific traits that turn casual browsers into paying customers. First, you need sharp focus. The item must be crystal clear so the shopper can see the fine details. Next, you need accurate color representation. If someone orders a bright red shirt and receives a dark maroon one, they will send it right back.
You also need multiple angles. Show the front, the back, the sides, and the inside if applicable. Give the buyer a complete 360-degree understanding of what they are getting. Finally, include context shots that show scale and use.
If you sell a backpack, show a model wearing it so the buyer knows exactly how big it is. Fortunately, advancing AI-assisted tools and accessible professional studio techniques are making top-tier product photography easier to achieve than ever before. Small businesses and solo entrepreneurs can now produce incredible visuals without needing a massive Hollywood budget.
The Case for Shooting on a White Background
There is a very good reason you see a clean white background used across almost every major shopping site. It remains the industry standard because it works remarkably well. A pure white backdrop eliminates all distractions, forcing the viewer’s eye exactly where you want it: on your product.
Shooting on white also ensures a clean, consistent look across your entire catalog. Furthermore, major marketplaces like Amazon and Google Shopping actually require primary images to have pure white backgrounds. You can easily replicate this setup on a budget using a roll of white paper and natural light from a large window.
While white backdrops are perfect for your main image, lifestyle or contextual backgrounds still serve a great purpose. Use lifestyle shots as your secondary images to help the buyer imagine the item in their own daily routine. A clean white photo makes the item clear, while a lifestyle photo makes the item desirable.
Turning Great Photos Into a Conversion Machine on Your Store

Moving from taking the photos to actually putting them on your website requires a bit of strategy. First, think about your image sizing and loading speed. Huge, uncompressed image files will slow your page down to a crawl, and slow pages frustrate shoppers. Compress your photos so they load instantly without losing their visual sharpness.
Next, enable zoom functionality on your site. Shoppers love to hover their mouse over an image to inspect the stitching on a wallet or the texture of a ceramic bowl. When you set up your page, sequence your images thoughtfully to guide the buyer from curiosity to confidence. Start with the clean white background shot, follow up with alternative angles, and end with the engaging lifestyle photos.
Do not forget to add descriptive alt text to your images. This helps search engines understand what you sell, bringing more traffic to your pages, and makes your site accessible to visually impaired shoppers using screen readers. Keeping a consistent visual style across your whole catalog pulls everything together, making your brand look incredibly polished and professional.
Common Photography Mistakes That Quietly Kill Conversions
Even well-meaning business owners make a few common visual errors that hurt their sales. Inconsistent lighting is a major offender. If one photo looks blue and the next looks yellow, your catalog looks messy and untrustworthy. The quick fix is to shoot all your items at the same time of day in the exact same spot, or invest in a pair of inexpensive studio lights.
Low-resolution photos are another conversion killer. Pixelated images make your brand look cheap. Always use the highest resolution your site can handle after basic compression.
Single-angle shoots leave too many unanswered questions. If you only show the front of a pair of shoes, the buyer will wonder what the sole looks like and hesitate to buy. Always provide at least three to four different angles. Finally, avoid using generic stock photos that do not match the actual item you ship. Authenticity wins every time. Take the time to photograph your real inventory so buyers get exactly what they see on screen.
The Results Speak for Themselves
The relationship between your photography and your business outcomes is massive and measurable. When you invest time and energy into your visual presentation, you see real results. Clear, accurate photos lead to significantly lower return rates because buyers know exactly what to expect.
You also see much higher add-to-cart rates. When an image answers a shopper’s questions instantly, they feel confident hitting the buy button. Great photography also creates stronger brand recall; people remember beautiful, well-designed sites and return to them later.
Getting your visuals right is one of the highest-ROI decisions you can make. Whether you are launching your brand today or growing an established catalog, upgrading your photos is a surefire way to increase your revenue. Grab your camera, set up your space, and start capturing the true value of what you sell.
FAQs About How Product Photography Influences Purchase Confidence and Conversions
How many photos should I include for each product?
Aim for a minimum of four to five photos per item. Include one clean main shot, two to three alternate angles showing different sides or important details, and at least one lifestyle shot showing the item in use.
Can I use my phone camera or do I need professional gear?
Modern phone cameras are absolutely capable of taking beautiful, high-converting photos. The secret is great lighting and stability. Use a cheap tripod to avoid blur and shoot near a large window for soft, natural light.
When does it make sense to hire a professional photographer?
Consider hiring a professional when your business is generating steady revenue and you want to scale up. A pro can save you hours of work, ensure perfect consistency across hundreds of items, and provide advanced editing that makes your catalog look highly premium.
What is the best image file format for my website?
JPEG and WebP are the best formats for website images. They offer a great balance between high visual quality and small file sizes, ensuring your pages load incredibly fast without sacrificing the crisp details your buyers want to see.